How Can We Help?
How do I make a resized design fit my hoop better?
There is a way to do this. But, before I tell you how, please remember the following: with our Edge-to-Edge PRO technique, the objective is not to fill the hoop as much as possible… the objective is to make sure that the body quilting designs fit the body of your quilt perfectly, with no partial designs, and little or no distortion to the design.
Now, with that said, in some cases, the worksheets in the PRO book and the Edge-to-Edge Plug-in for My Quilt Planner can calculate a file size that is too large or too small for your preferred hoop. For example, if you have a nice 8″ x 12″ hoop, and the calculations give you a 5″ x 9″ file, you would reasonably wonder if you can use more of your hoop. Here’s how to do that.
Overview — If the calculated design is too large, you will want to INCREASE the number of rows and/or columns in your quilt body calculation. Having more rows or columns will create a smaller design.
If the calculated design is too small, you will DECREASE the number of rows and/or columns. With a smaller number of rows or columns, the design will get bigger, to fill the space.
In either case, when you make a change to the number of rows and/or columns, look at the design in Embroidery Tool Shed, to make sure that it’s not distorted. Christine’s rule of thumb is that “if the design looks bad on screen, it will look bad when you stitch it.”
If you’re using the Worksheets from the PRO book — the instructions on page 7 of the book, under the heading “Adjusting if the design looks distorted after resizing” give a good example of how to use the worksheet to change the size of a design. Even though the instructions are about a distorted design, the basic approach is good for how to use the worksheet to change a file size to better fit your hoop.
If you’re using the Edge-to-Edge Plug-in for My Quilt Planner — use the following instructions to change the file dimensions in the E2E Quilt Planner Wizard.
1 – Create your quilt plan.
2 – Check the dimensions of the body quilting.
A – Click on the body design in the Sequence pane.
B – Click on the purple tab in the Properties box.
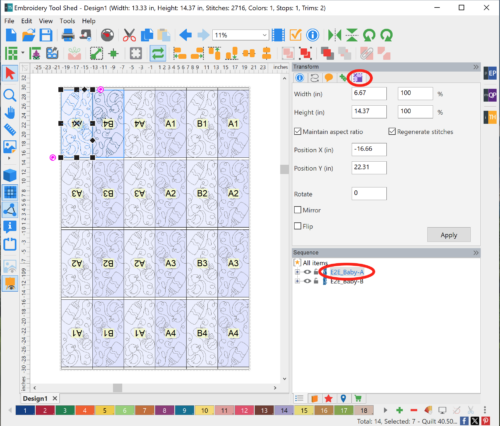
3 – If the file dimensions are too large or small, click the Edge-to-Edge Quilting icon in the toolbar at the top of the screen.
![]()
The Edge-to-Edge Quilt Plan Wizard displays.
4 – Change the number of columns and/or rows as needed. Remember: Increase the number if you want the design SMALLER, and decrease the number if you want the design LARGER.
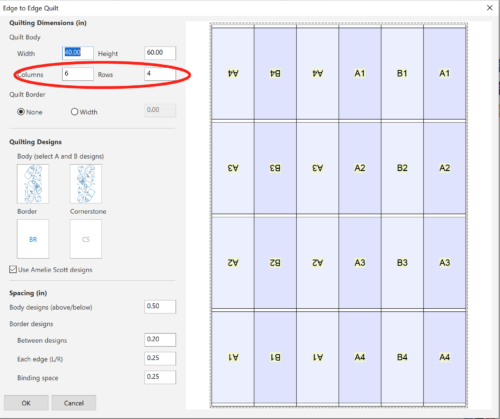
5 – Click OK, then check the size of the design, as you did in Step 2.
Repeat Steps 3 and 4 as needed, until you get a size that works for you.
That’s it!